Pages

Tuesday, May 4, 2010

Baby Boys

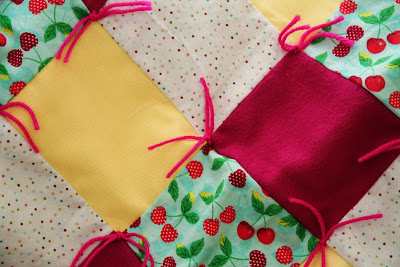
I recently finished the second baby blanket that I donated in an auction for a friend with Cancer and I loved it so much it was hard to send it away! I was so happy to feel like I could help in some way and I am so glad that the little boys that received them will enjoy them. All my quilts are typically one of kind because I make the pattern up as I go along, I take pictures just in case I ever want to do it again :)

I heart me some cowboys


This is the first one I finished and sent off, I loved the colors and the different textures


Sunday, March 7, 2010

Scratchin an Itch!!

The last few weeks I have had the itch once again to do some projects!! Here are some of the latest ones!!

Hooter Hider Tutorial

I know there are lots of ways to make these, but here is mine!


The below drawings were some we did as a family, I had wanted to frame them but I hadn't found the perfect ones and then I saw this and decided to make my own version. I bought some garden trellis, it comes in lots of shapes and sizes and is very inexpensive, and you can purchase it at any home improvement store tip: (I sanded it down just a bit to get some of the rough edges off)


Then I found some wooden drawer knobs like these, spray painted them with paint I already had. I then glued them, using wood glue, to the trellis and while they were drying I searched the closets and found 5 wooden pants hangers and then hung them from the trellis.


Here is the final result!! I love having the families art displayed in a new and casual way, also we can change them out very easily if we want to!!


The other quick project was this great side table I found at a local thrift store for $5.95, bought some rust orange spray paint, sanded it down a bit and sprayed it! I let it dry overnight and now it is getting along quite nicely with the other furniture in our front room!!


Tuesday, January 26, 2010

Monday, October 19, 2009

Halloween Wreath, Hooter Hider, and Baby Blankets

The last few weeks I have had many the project to keep me busy!
This is a Halloween Wreath that I made out of ribbon, got the idea here
(Dummy me forgot to take a picture before it snowed/rained)

I made this "Hooter Hider" for my sister who just had a baby in August


The below blankets were made for my new friend Annie, she is expecting her first little girl any day!!


Tuesday, September 8, 2009

I'm On A Roll!!

Well since I have been in the mood, I figured I would just keep the juices flowing and work on updating some curtains that I found at my favorite thrift store, Mile High Thrift! I paid just $5 bones for both and then the other night I found some great fabric in the clearance at Wal-E-Mart for $1.50 per yard. The two ending up together was actually an accident, they just happened to be sitting next to each other and I thought "HMMMMMM!" Today I just decided to give it a go and here is the result! I am actually a little in love!

Before


After

Up Close

Over All Look


Now I could have lined the orange fabric but I decided I liked the Sunlight coming through and showcasing the pattern!


Stay Tuned for the other fun things I have been doing!!

Thursday, September 3, 2009

New Life!!

Amidst all the other projects I am working on this one was a first. I found this coffee table at my favorite thrift store for $7.95 and swooped it up, it had great lines, it seemed very sturdy and had tons of potential! Compared to the couch I am working on this seemed like it would be a much quicker project so I made a stop at Wal-Mart for spray paint, sand paper and got started right away!

Supplies
80 grit Sandpaper
220 or Extra Fine Sandpaper
3 Cans Spray Paint in Ivory Satin
Tack Cloth (slightly sticky to remove sanding dust)


First Step

Using the 80 Grit Sandpaper I sanded the entire table down just to give the paint enough grit to grab onto. This table was pretty worn so it didn't need any really heavy handed work, but some pieces need a lot more sanding.


Second Step

Use a Tack cloth (Wal-mart or other home improvement section) to remove all sanding dust completely! This is an important step as you want the paint to look smooth going on.

Third Step

Apply first thin coat of paint to surface (follow the instructions on the paint can you are using to know how long it will take for the paint to dry) I used one that allowed for multiple layers if they were given about 10 min to dry after but no more than an hour.


Next repeat Step 1 & 2 using a 220 or Extra Fine Sandpaper in between each layer of paint. For this project I didn't have one entire day to work on it so I did this over a few days.


Last Step

After the final coat of paint had completely dried I used the 220 Sandpaper to distress it just a bit around the edges of the table. I also used a hammer and some other hard objects to add a little more character to the table i.e. dents & scratches. I did not use a sealant on this table but you would want to if you were using it for eating off of.

I am not a professional in this area but I did a lot of looking online and talking to those whom had done similar projects before, to know some of the tricks!!


I am pretty happy with the end result! Honestly I didn't mind the table before the paint but I LOVE it now!!

Friday, August 21, 2009

From Drab to Fab!!

For those that have kids getting ready to start school, or like mine who already have, it can be expensive getting all the supplies!! Well, we are on a tight budget and Lexi wanted a messenger bag that cost 34.00! I thought that was ridiculous so we found an inexpensive one from Wal-Mart for $9 and with a fat quarter and some ric rac and a button I gave it a little make-over! It only took me 10 min and a total of 1.75 extra to make hers stand out a little! She was happy and so was I!!! I forgot to get a before picture.

Fat Quarter of Fabric .99 Cents @ any Craft Store

Free (cause I had some scraps at home)

.75 cents for One big lime Green button

Total for a revamped messenger bag 11.75!!